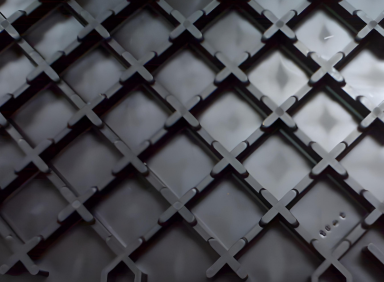
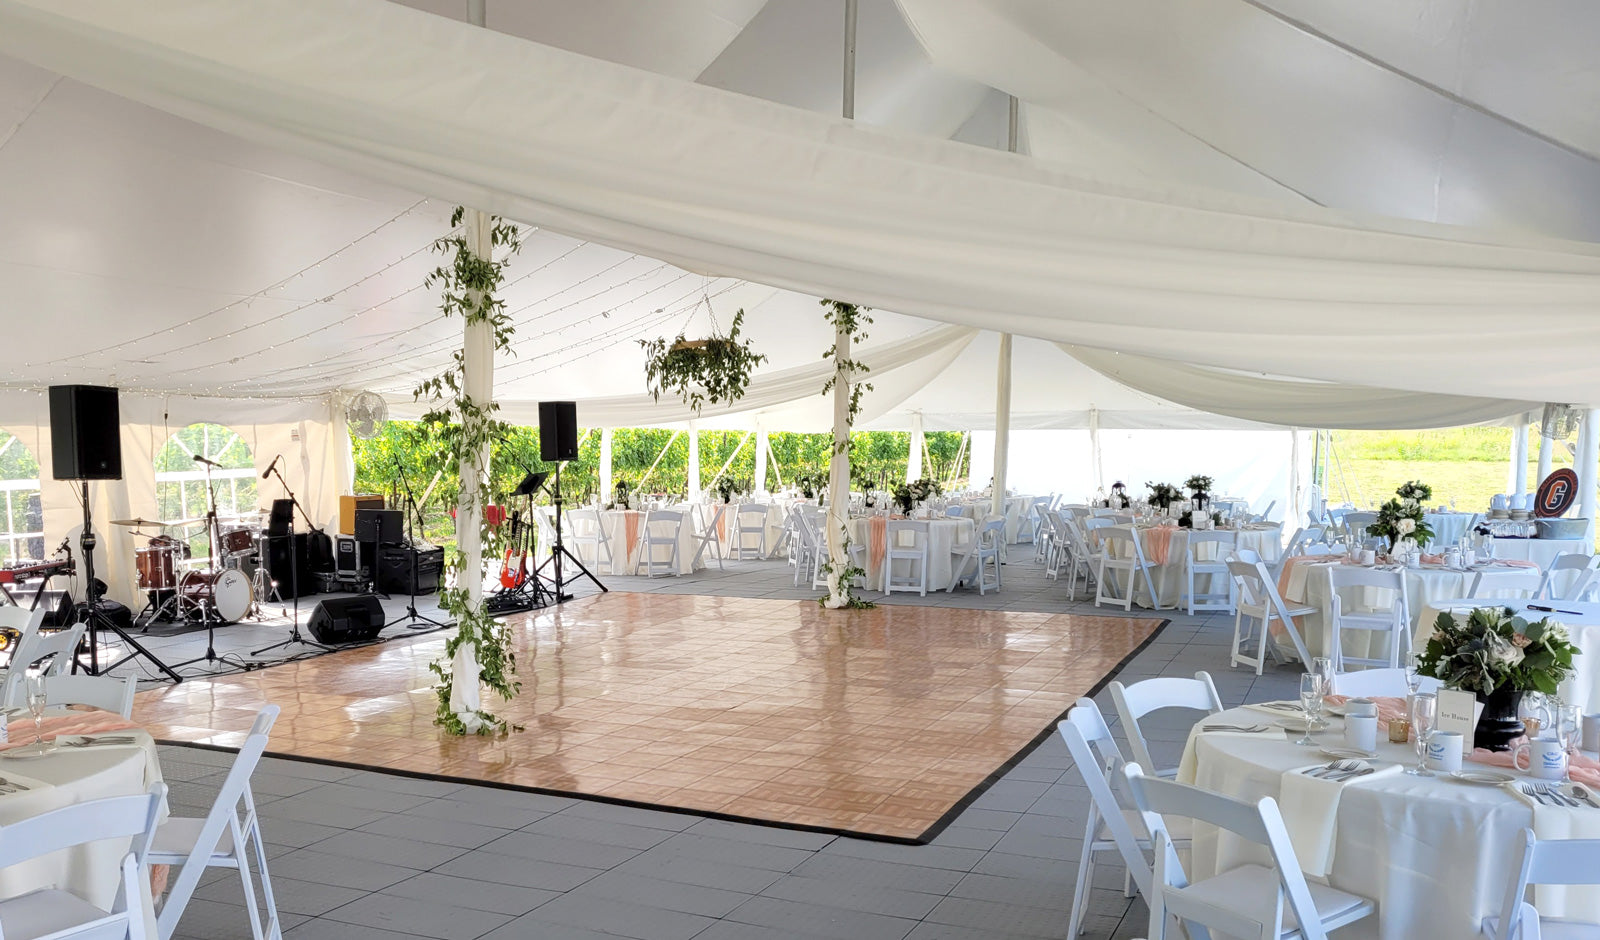
Complete your floor’s look with optional finished edges. The edges “snap” into place using the same interlocking system as the dance flooring tiles and provide a clean, beveled border around your dance floor.
Pair large text with an image to tell a story, explain a detail about your product, or describe a new promotion.Specially designed cart for safe and convenient storage of your portable floor, minimal space required! A perfect tool to store and transport the 21′ X 21′ dance floors

simple and effective tiles
Attractive event flooring that is easy to install.
Simple Installation
In four simple and fast steps, you can have your surface fully installed in minutes or less.
Getting Started
The panels have two sides with female PowerLocks, and two sides with male PowerLocks. All tiles on any given installation should always have the female PowerLocks going in the same direction.
Step One
Begin the installation by laying down your first panel in any one corner and pointing the female PowerLocks in the two directions that additional panels are to be added.
Step Two
Place the next panel so that the male PowerLock line up over the top of the female loops on the first panel. It's important to make sure that the female PowerLocks are facing exactly the same direction as the first panel.
Step Three
Gently step along the joint of the two panels. You will hear and feel the PowerLocks snap into place as you go.
Step Four
Once the two panels are joined, repeat steps one through three remembering to keep the female PowerLocks aligned until your floor is complete. That's all there is to this easy-to-install flooring!


